Van Build
I live in a van that I built. Here’s how.

New and empty = no surprises
I started with a new and empty RAM Promaster (high roof, 159” wheelbase). One of the best pieces of advice I received from friends who had converted vans to live in was to never inherit somebody else’s half finished build. Those were sage words. On day one I could see all the underlying components of the van that I would be building on top of, eliminating the possibility of discovering something I didn’t like further down the line.

Installing the fans - the point of no return
Due to the global supply chain disruptions, finding a new van was actually quite difficult. By the time I drove the van home from Seattle, I had had months to research everything about the build and stockpile parts. A week later, I cut two large holes in the roof to install the fans. There really was no going back after that.
The fans are sealed to the sheet metal roof using butyl tape under the flanges, and a bead of 3M 4200 (a medium strength marine adhesive) around the perimeter. Screws through the sheet metal anchor the external mounting plates to an internal wood frame. No leaks have emerged in over a year of van life.

Under the walls, ceiling and floor
Vans are quite rudimentary cars. Unlike a passenger vehicle, which has sound damping material on flat surfaces to reduce oscillation, everything behind the driver’s area in the van was bare sheet metal. When I drove the van home to LA, it was so loud inside you could barely listen to music.
Sound damping and sound insulation are colloquially used in an interchangeable way, but they rely on different underlying physics. I installed both. Sheets of sound damping material are adhered to flat panels which would otherwise vibrate like a drum. Their mass lowers the resonant frequency of the panels, and their high internal damping coefficient reduces the oscillatory response. These sheets don’t require 100% coverage to work, and don’t make a significant difference on stiff parts with high first resonant modes.
I chose 3M Thinsulate SM600L, a synthetic fleece, for my acoustic and thermal insulation. For the majority of van dwellers, this is the insulation material of choice, although there is still a case to be made for foam board insulation in true ski/snowboard vans due to its higher R value for a given thickness. Synthetic fleece is highly mold resistant, doesn’t squeak when it flexes, and allows moisture to pass through, eliminating concerns about trapped moisture.

Whispering to electrons
Electrical fires are one of the most common causes of death for vans, including the one my dad’s neighbors used to own. With that in mind, I made a number of design choices in the electrical systems to reduce risk. I chose to run everything off of 12V DC power, eliminating the possibility of electrocution, and broke circuits out into what some would consider an excessive number of fuses, simplifying future debugging. To reduce the probability of chafing leading to a short, I wrapped harnesses in two layers of braided sheathing, and padded areas where they passed near sharp edges on the sheet metal framing. In the past I’d spent my fair share of time playing around with electronics, but building harnesses that would last for years was an interesting new challenge. Finally, I chose to use a combined battery, inverter, solar charge controller and battery to battery charger made by Goal Zero. A number of companies have begun to produce units like this in recent years, and they have the combined bonuses of being designed by an actual electrical engineer, and being cheaper than an equivalent set of individual components.
45 hours of building and installing the low voltage harnesses later, I had the internal wiring complete. This was one of the projects I enjoyed the most.


Here comes the sun doo-doo-doo-doo
A lot of people choose their solar array size based on expected demand. This is great in theory, but starts to appear less relevant once you look at the cost of components. For a given solar array size, the batteries appropriate to store a day’s worth of that power cost significantly more than the panels themselves. Given the low cost of panels, the frequency of them being shaded by snow or dust and the limited surface area available on the roof of a typical van, it typically makes sense to install the largest solar array one can fit. In my case that turned out to be 400W, sandwiched between the front and rear fans.
I chose to wire the panels in series rather than parallel for 2 reasons. First, the 2x reduction in current associated with series wiring results in a 4x reduction in resistive power losses. Second, the series arrangement eliminates need for fuses. Solar arrays at their maximum power point operate within 10% of their short circuit current, making fusing a single panel impractical. The increase in current created by a short would be too small to reliably trigger a fuse or circuit breaker. The only case where fuses are useful is when panels are wired in parallel, offering the opportunity for the current of multiple panels to flow backwards through a short. This excellent guide has more details on the intricacies of overcurrent protection for solar arrays. It’s worth noting that historically wiring panels in series would have made them highly sensitive to shadows, as shading a single panel would raise the impedance of the entire array. Modern panels with built in bypass diodes have reduced the impact of this issue substantially.

Cedar ceiling
I wanted my future house on wheels to have a clean and coherent aesthetic. Having seen far too many builds where most surfaces were bare wood, I decided instead to use off-white paint for vertical surfaces, reserving wood for horizontal areas that I wanted to stand out. For the ceiling I chose light colored cedar tongue and groove panels, and sealed them with a water based polyurethane. Later on, I used darker woods like mahogany and stained birch for the horizontal surfaces lower down in the van. This aesthetic, where wood is used only as an accent, really works for me. It makes a tiny space feel airy, without being monotonous the way painting everything a light color would have.

Let there be light!
A van is a tiny space. You don’t have room to give work, play, food and relaxation their own purpose built areas. What you can do is use design to make the same space feel different for different tasks. I found lighting to be an effective way to achieve this goal. My van has 5 separate lighting circuits, each controlling a set of recessed LED pot lights with a dimmable switch. One can use varying levels of light and color temperature across each circuit to draw focus to a particular activity, or change the atmosphere to be more upbeat or more relaxed.
Front-main lights: 6 LEDs that provide area lighting to the front of the van. Warm color temperature for relaxation.
Rear-main lights: 4 LEDs that provide area lighting over the bed. Warm color temperature for relaxation.
Kitchen lights: 4 LEDs above the kitchen area. These are a cool color temperature for an energetic feel
Dining lights: 2 LEDs opposite the kitchen to illuminate the dining table. Also a cool color temperature.
Reading lights: 2 LEDs above the head of the bed. These warm lights are the only ones controlled from the rear of the van. In the picture on the left they aren’t turned on, because I installed the cabinet where their dimmer switch lives later in the build.

Walls
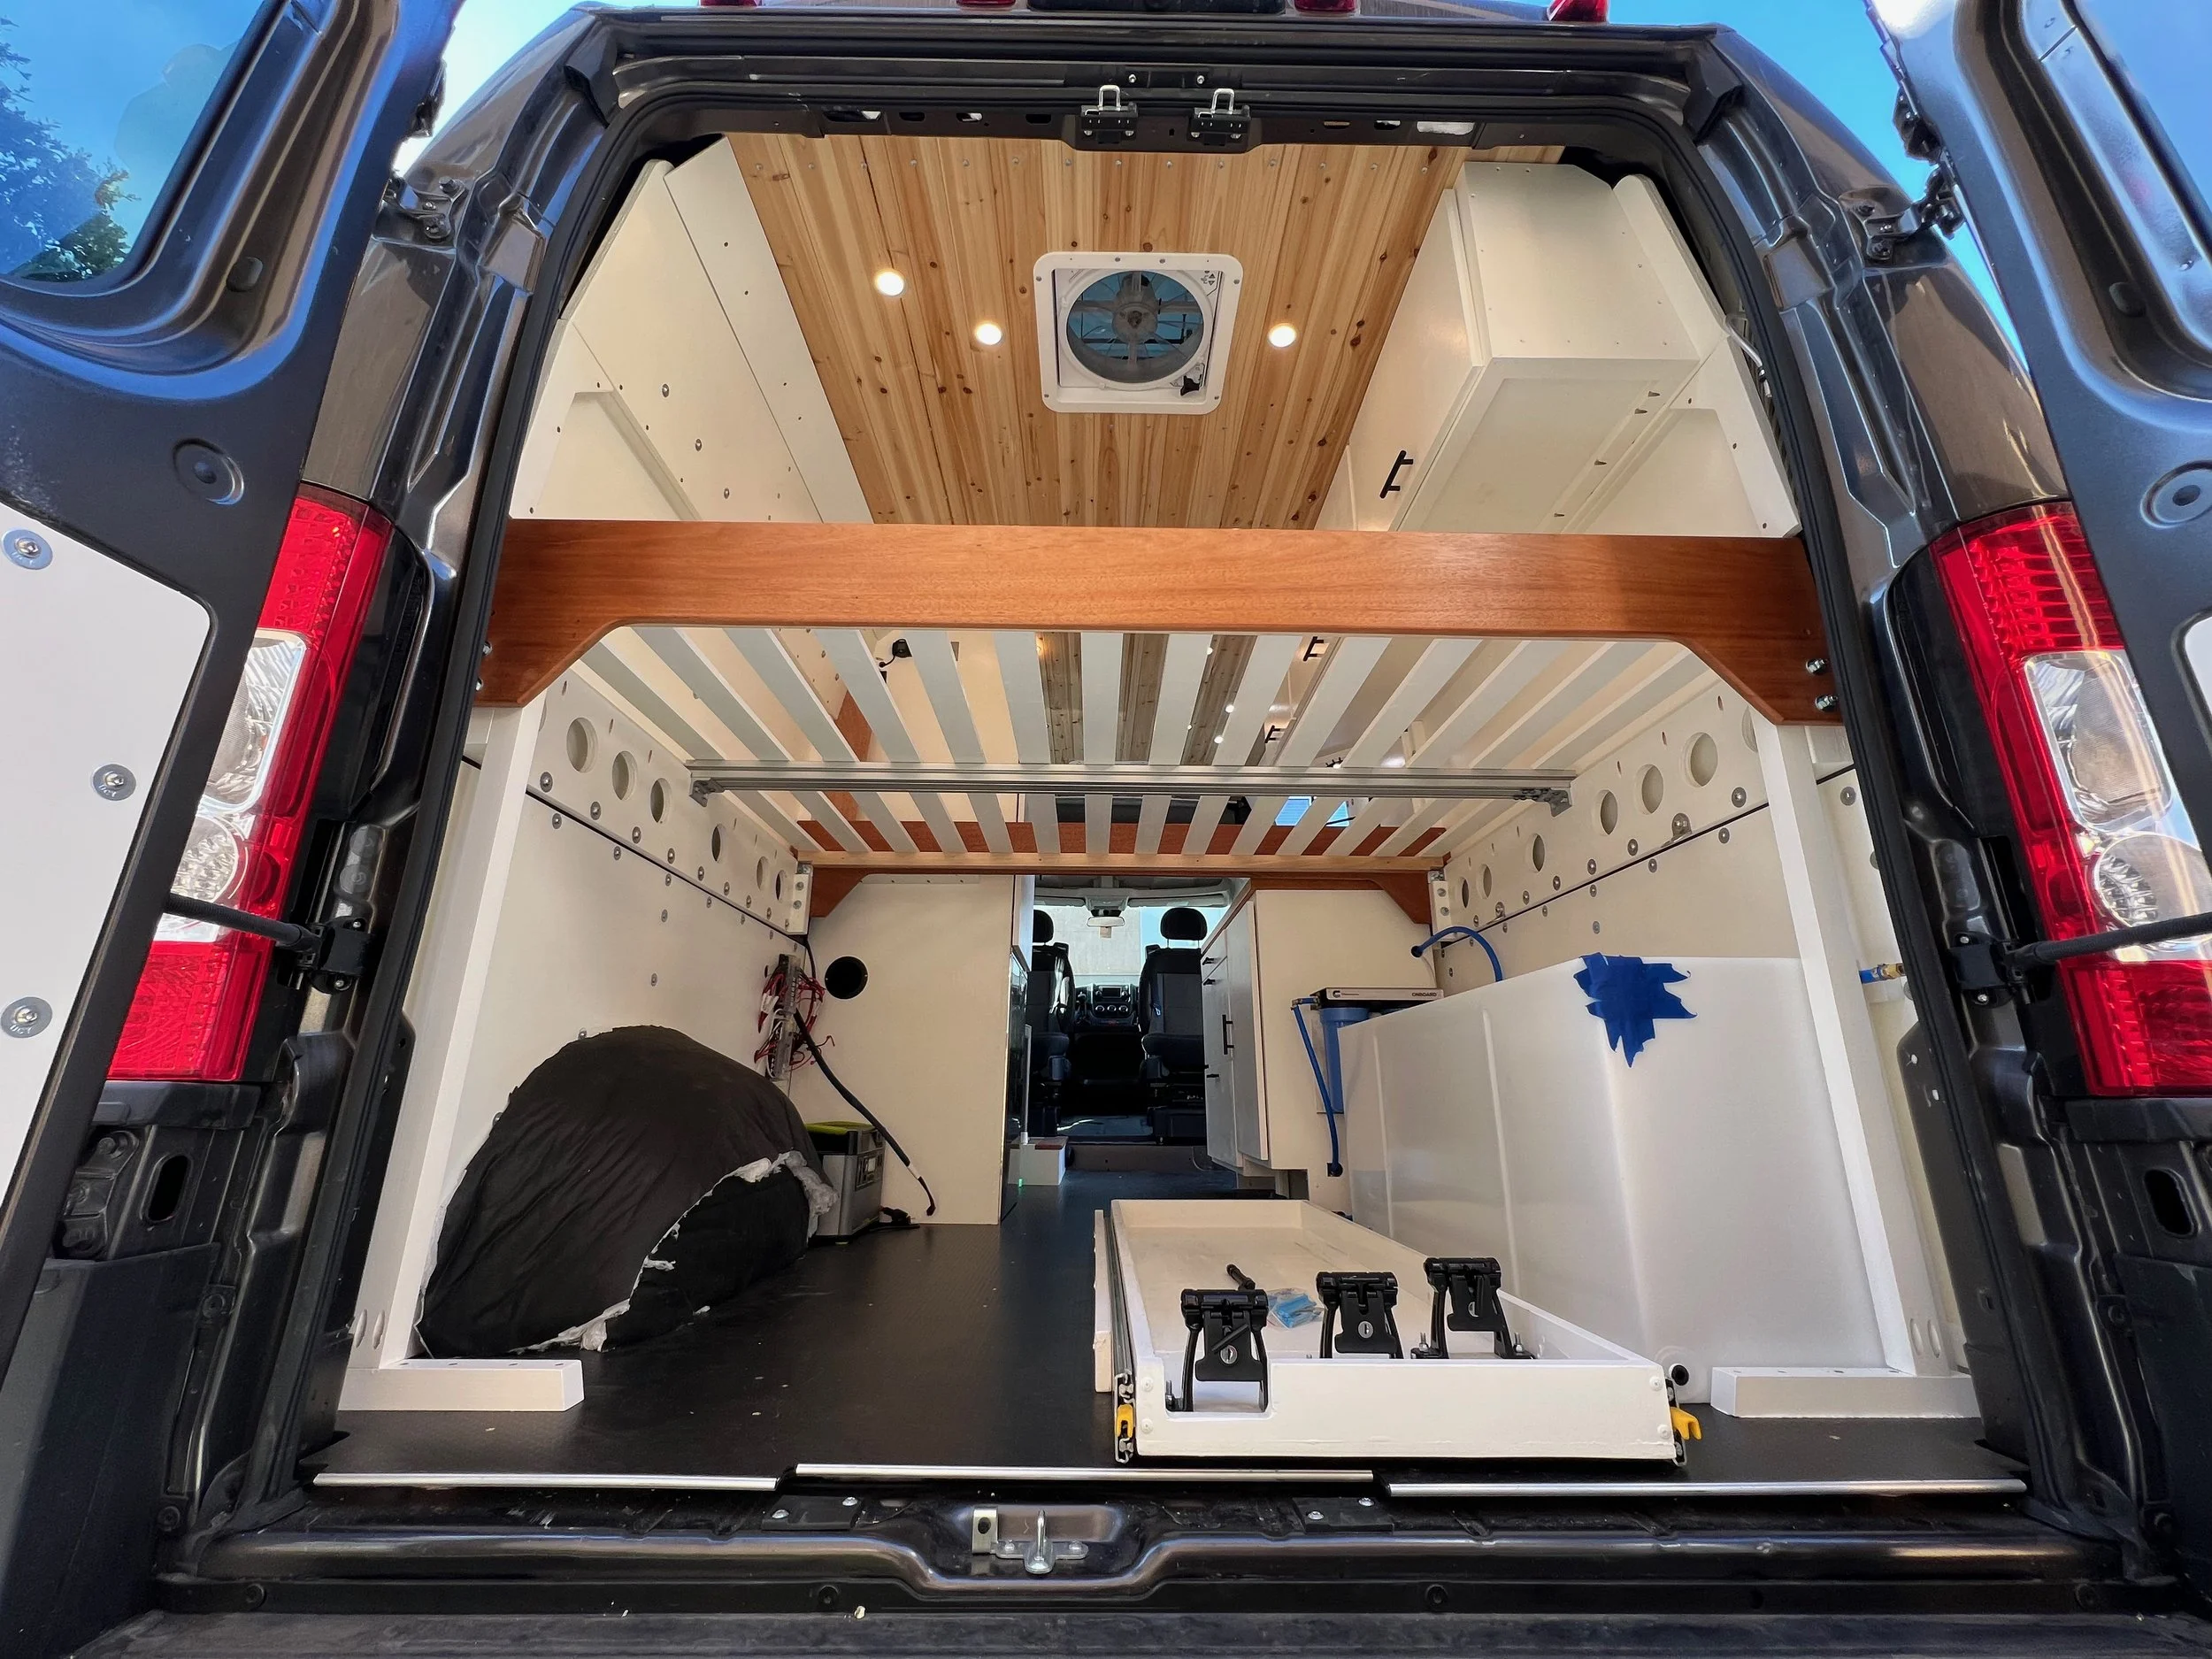
Designing the walls in a van is a tradeoff between woodworking effort and space. Complicated wall shapes can take advantage of pockets within the sheet metal framing of the underlying vehicle to create more internal space. I chose a reasonable middle path by building pockets into the areas around the head and foot of the bed, but using flat walls in the front of the van where saving a few inches didn’t make a large difference. With the rear pockets I’m able to fit an unmodified full mattress (75” x 54”), allowing people slightly north of 6’ tall to sleep comfortably.
Through intentional placement of cabinetry in places where the van’s sheet metal framing was particularly obtrusive, I was able to avoid making any awkward bumps in the walls.


Gasoline heater - a winter essential
It would be a little strange to live in a van for a year without ever being a ski bum. I knew I wanted to take my house to some properly cold places, ones where a propane powered heater would down fuel at far too high of a rate to be practical. Fortunately, a few companies make heaters that can run directly off your van’s gasoline or diesel tank. I chose the Webasto Air Top 2000 STC, a 2kW heater that uses a heat exchanger to keep cabin air isolated from combustion gases. This was by far the most complicated single installation of the build. Among other things, it involved cutting a 4” diameter hole in the metal and wood floors, installing a dedicated fuel pump underneath the van, routing a large collection of harnesses, and creating intake and exhaust air pathways for the heater. I generally found Webasto’s heater to be well designed for service and installation, although I would like to see the fuel port moved further away from the exhaust to reduce the risk of leakage leading to a fire.
It’s worth pointing out that these heaters have a well documented failure mode when being used at high altitude. They lack an air flow or pressure sensor like a typical car engine has to adjust the amount of fuel going in as oxygen levels decrease, causing rich combustion and therefore soot production. Extended stays at high elevations can cause the combustor to clog with soot. I unfortunately found the limit of this while skiing in Crested Butte, Colorado. At 9000 feet, Crested Butte is both very high and very cold. As of right now there isn’t a great solution to this issue. These heaters can be tuned at high altitude to achieve a lower fuel flow rate, but tuning to above 6000 feet reduces the fuel flow rate enough that it risks flaming out the combustor in between pulses of the fuel pump. All heaters currently on the market which can adjust to higher altitudes have significantly higher heat outputs, to the point where they are not well suited to running at steady state in a small van. I’d love to see a better van heating solution come on the market soon. A smaller displacement fuel pump that cycles more often paired with a manifold air pressure sensor would be a great start.

Cabinetry - pushing my woodworking skills
I consider myself to be a solid B+ woodworker. If you’d like to see how the A team does things, I’d highly recommend checking out Acorn to Arabella, a wooden boat building group that I worked with after completing the van. Cabinetmaking was a great way to expand the limits of my woodworking knowledge. The van has 4 cabinets, all of which came with their own unique challenges. One with an astute eye could likely recognize that my cabinets got better in the order that I made them.
Raised floor: this cabinet has two purposes. The first is to raise the level of the floor behind the driver’s seat such that when it is swiveled backwards your feet don’t dangle in the air. The second is to provide a home for the gasoline powered heater. It’s a frameless construction primarily made of 1/2” marine plywood, with mahogany offcuts from the bed frames used as accented cabinet lids.
Dresser: this long and narrow set of shelves with gas sprung doors sits above the foot of the bed, and holds all my clothes. It’s high up, so reducing weight was particularly important. I used a face frame construction with poplar 1x2s and 1/4” baltic birch plywood.
Fridge: this floor to ceiling creation houses the fridge in the lower half, and shelves for food and clothing in the upper half. The crux of this build was that it was too big to fit through the door in one piece, so I designed it to be assembled in place after painting from a set of subassemblies. By this point in the cabinetmaking I had adopted a uniform face frame aesthetic with solid doors.
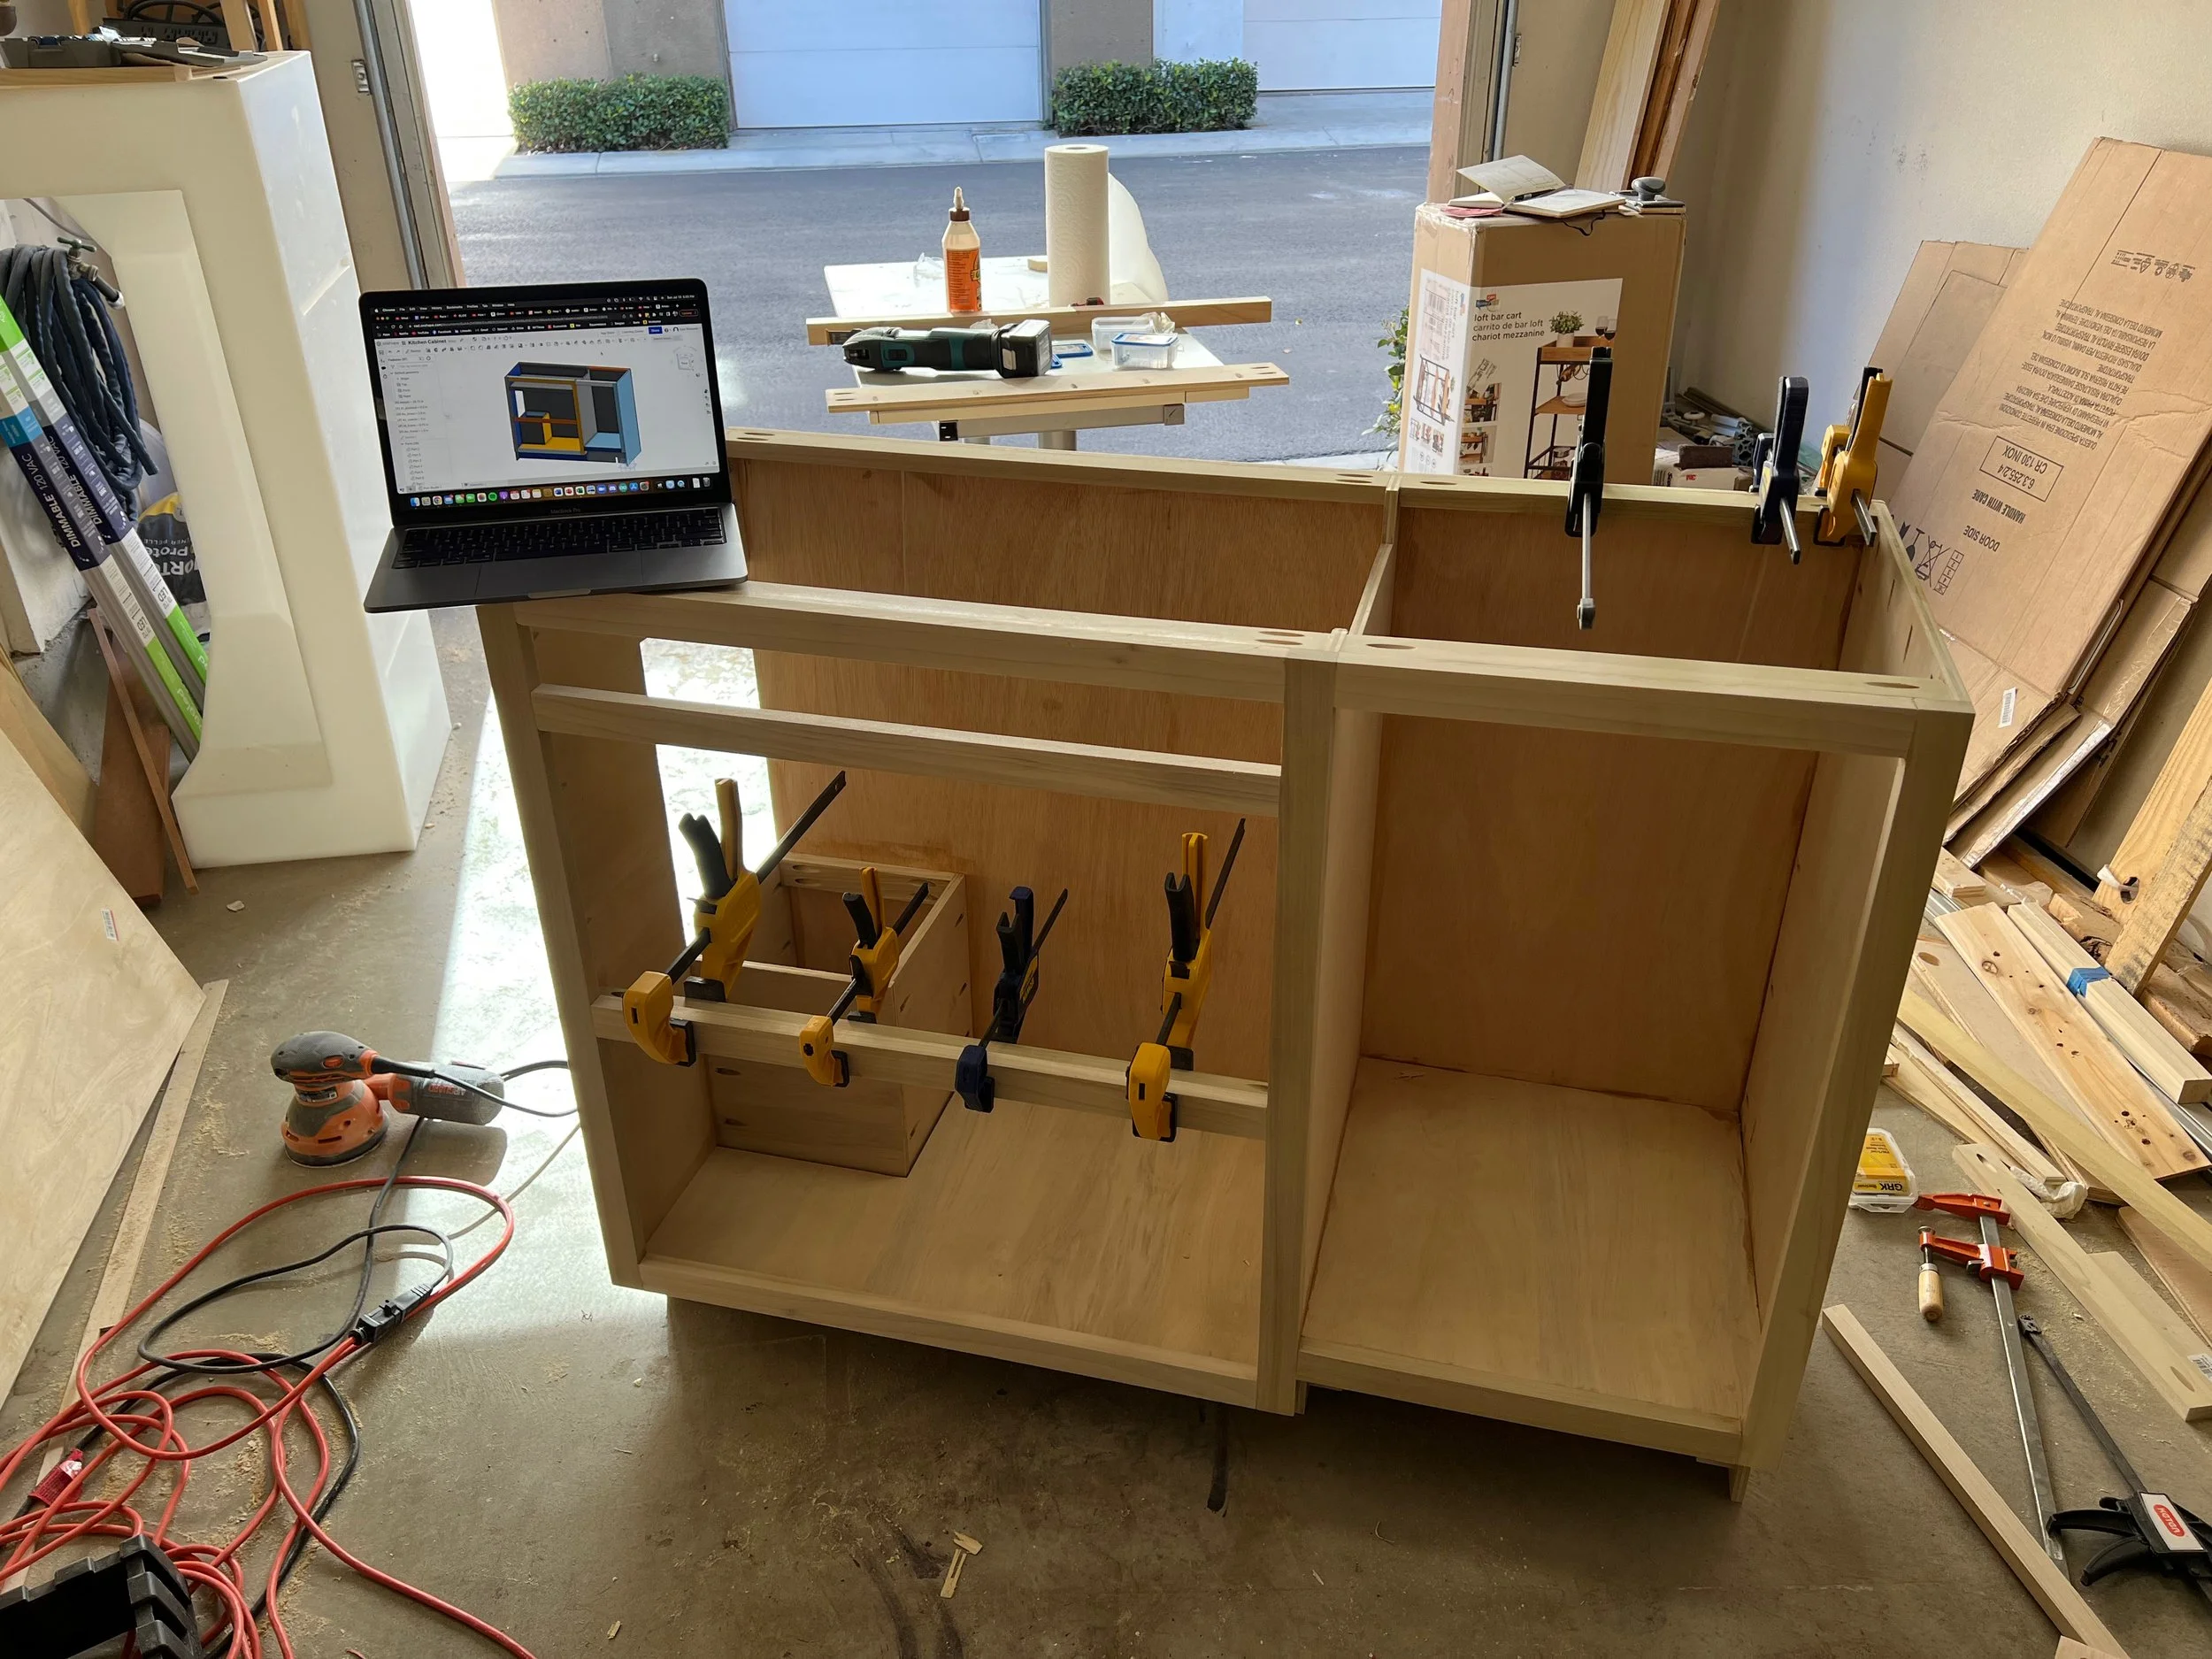
Kitchen: I saved the most complicated for last. This was actually one of the only projects I used CAD for in the van build. Going without a computer model of the overall van was a great choice, as it reduced the inertia involved with making design changes, and allowed me to experiment with a style of building that I wasn’t as familiar with. Modeling the kitchen cabinet in advance though was absolutely worth it, and allowed me to fly through by far the most complicated cabinet build in record time.

Bedtime
Although I made most of the bed components early in the build, I chose not to install them until the very end, as having giant beams across the rear of the van would have made working on other things difficult. The bed slats are supported by a bonded mahogany and poplar frame on each side, and an 8020 aluminum beam down the center. Supporting a mattress with open slats instead of a solid piece of plywood allows moisture to vent, eliminating the risk of mold growth. Mahogany displays an interesting surface darkening behavior when exposed to sunlight, something I discovered as I cut and sanded the bed frames. Over time the frames have gradually darkened towards a color similar to what they were before sanding. They’re some of my favorite wood pieces in the van, and maintain the theme of horizontal objects not being painted. Like the other “exposed” wood pieces in the van, these frames are coated in a water based polyurethane sealant.
One risk I was worried about with the bed frames was that they connect sections of the van that normally would have flexed relative to each other. Some amount of load will inevitably be driven into them as the vehicle body shifts during driving. Fortunately this hasn’t led to any cracking in the frames or their mounting points over the past year. To be sure that a single failed mount wouldn’t caused the bed to come crashing down with me in it, I anchored each frame endpoint to two objects.

Counter surfaces
I liked the aesthetic of butcher block counters, but disliked the high mass and perpetual need to oil them. Therefore I started with normal butcher block, hollowed out the underside of the counters, stained the surfaces to replace the darkening and yellowing of the oil, and coated everything with polyurethane. I’d been warned going into this that the sink/stove combo I’d chosen would require some creative woodworking to nest nicely into the countertops. It did, but the final product came out quite well. In all, there were 3 butcher block pieces: the kitchen counter, flip up kitchen leaf and dining room table

Kitchen appliances
I like to cook. Having as nice of a kitchen as one could create in a single digit number of square feet was therefore quite important to me. Fortunately, one can assemble a very functional set of fresh water, grey water and propane systems in a small space. Fresh water starts its life in a 29 gallon polyethylene tank situated over the right-rear wheel well. One of the best decisions I made in the van build was to use a foot pump for water rather than an electric one. It’s super simple, gives more direct control over water use than a valve, and can survive being frozen without damage. From the foot pump, water passes through a set of filters, and then goes through a normal residential faucet. After going down the sink, that water passes through a P trap before being dumped into a vented 5 gallon grey water tank.
Finding a home for the propane tank was the trickiest part of these systems. To keep a leak from leading to an explosion, propane tanks on boats and RVs are stored in a “propane locker,” which is sealed from the interior of the vehicle and vented overboard. Because propane is denser than nitrogen and oxygen, you want the door on top and the vent on bottom. As we learned the hard way with rockets, it’s actually quite hard to make a door that consistently seals well. I ended up placing this locker inside the kitchen cabinet, which uses space very efficiently, but required some rather creative woodworking to make L shaped drawers around it. The final design has worked very reliably, cooking many hundreds of meals without noticeable propane leaks.


