The theory behind adding aerodynamic elements (wings, splitters, etc.) to a racecar is pretty simple: downforce from the air gives you more grip in your tires, letting you corner, accelerate and brake faster. For a long time the common logic was that FSAE cars didn't operate at high enough speeds to make wings worth it, but a few years ago that started to change. With only a few notable exceptions, all the top teams in FSAE today use aero packages to decrease their lap times.

Streamlines and downforce visualized on a Formula 1 car
Our team didn't believe the hype, so at the beginning of the 2015-2016 season, I started doing lap simulation analysis to determine if we actually should develop an aero package. The answer was a fairly unequivocal yes. A moderately sized front and rear wing would take around 4 seconds off each lap, a huge amount of time in our racing series. Though the team didn't have enough people to devote members exclusively to aerodynamics, my chassis team was strong enough that we could start developing an aero package and still hit our chassis deadlines. So we went for it.
Having figured out the goals, step two was to learn how to actually build an aerodynamics package. It came down to three major hurdles:
1) Aerodynamic design
2) Composites manufacturing
3) Mechanical implementation
To tackle the aerodynamics side, two other members learned to do computational fluid dynamics analysis, while I built a set of water tunnel models to visualize flow around the vehicle. These models helped us understand flow characteristics around the endplates, which are very difficult to capture accurately in CFD analysis.

Early CFD analysis on the front wing. Note the high velocity, and therefore low pressure, under the wing, which creates downforce
We pushed our composites manufacturing skills far beyond anything we'd ever done before to build the aero package. Early in the year, I started testing airfoil layup methods, developing a fast and reliable way to make carbon fiber wings. With each test I learned more about the issues I was up against, and how to solve them. By mid-fall, I had the process dialed in.
We started each airfoil by cutting a foam core out of insulation foam with a huge hotwire. The back side of this cutout became a perfectly fitting female mold for the wing's carbon fiber skin.

Theo and Aaron cutting airfoil cores with the hotwire

Cut and sanded airfoil cores
Next, each wing got a thin skin of carbon fiber reinforced polymer (CFRP) on its surface for strength. We used a simple but reliable wet layup process, where epoxy polymer is manually infused into the carbon fiber sheets before it hardens. While it's a bit heavier and takes more finishing work than using carbon fiber which comes with resin already infused (aka "prepreg"), the wet layup process follows the classic 80-20 rule of engineering: you can get 80% of the results at 20% of the cost. We did this on a budget.

Teaching team members to infuse carbon fiber sheets with resin

The sheets were wrapped around the core, and placed inside the mold, where the resin cured under vacuum to create rigid CFRP airfoils

Trimmed and sanded wing elements prepared for painting. Endplates are in back.
With the manufacturing process dialed in, the last major design hurdle was the mechanical mounting between the wings and the chassis. These structures had to be extremely rigid, but also easily installed and removed. I decided to use bonded aluminum brackets to mount the front wing, and steel tie rods to connect clevises on the rear wing to tabs on the chassis. Both of these structures proved to be very rigid, but the front brackets were hard to install on the frame. They're definitely an area for improvement this year.
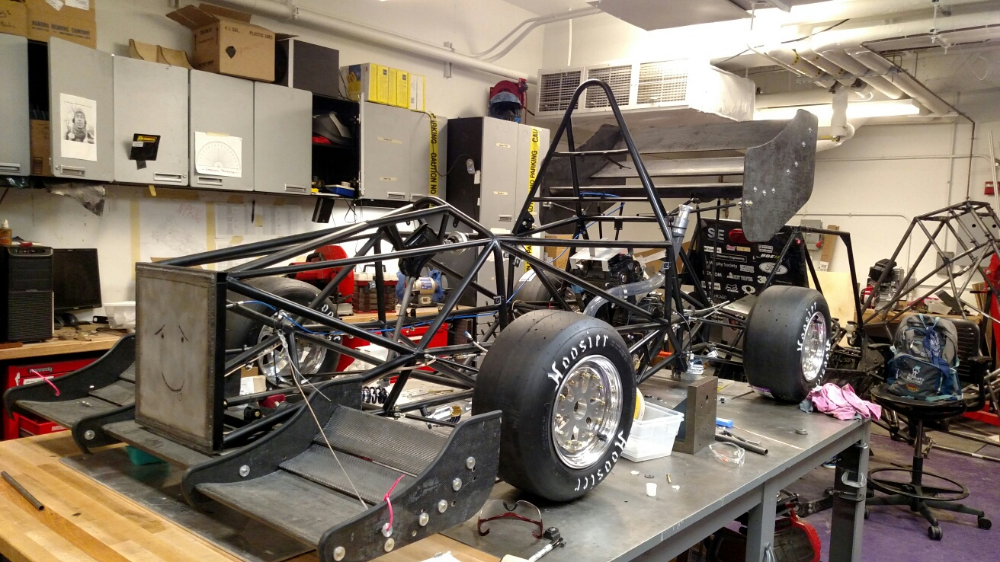
First assembly of the full aero package onto the chassis
3 weeks after we assembled the aero package, the rest of the car was ready to drive. This brought us to the final parts of the design cycle: testing and racing. We weren't expecting any major failures due to the aerodynamic loads, but I was concerned about what would happen to the front wing when it hit a cone. Our racetracks are marked out with cones, each of which makes a nice little obstacle to take out a wing at 60 mph. Our first testing day we hit two, which did this:
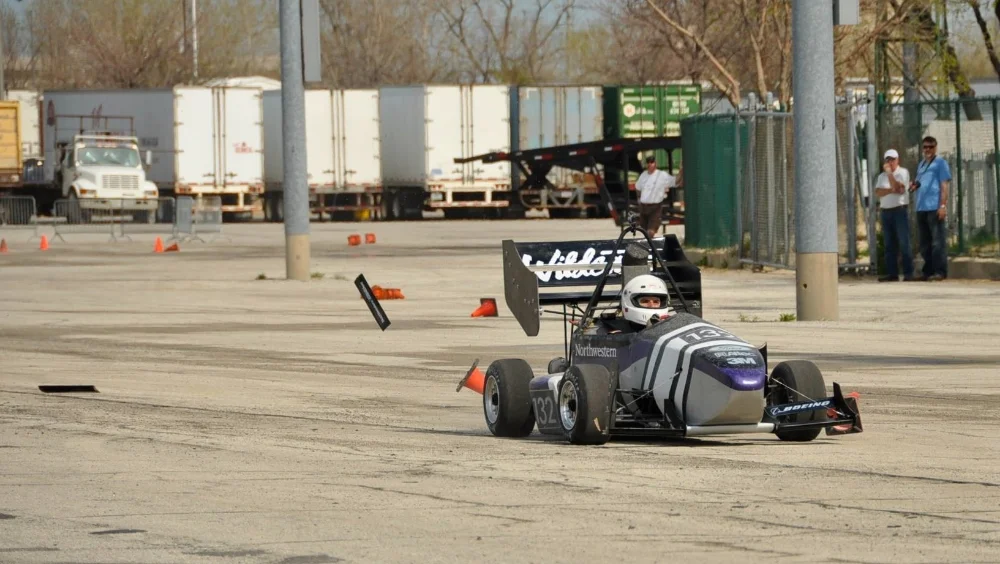
Oops
Well, nobody said this was going to be easy. We actually discovered three completely independent failure modes in this test, all of which we were able to fix. Our carbon fiber airfoils themselves had worked as intended, and stayed intact even after flying off the car. The aluminum and wood pieces we had glued inside the ends of them to thread bolts into had sheared out of the airfoils though. We'd also caused the inner endplates to fail in bending, as a cone impact going backwards towards the outside of the wing creates a large tension load in the front of the wing.
We replaced all the wood endpieces with aluminum ones, and bonded the aluminum directly to the carbon. We had previously included an extra layer of epoxy in between the aluminum and the carbon to prevent corrosion, which had slipped off the aluminum and let the airfoils go free. To solve the endplate bending issue, we switched the core material from wood to nomex honeycomb, which was twice as thick and could be more reliably bonded to the carbon fiber skins on each side. We also ran a steel rod all the way across the front wing to take the tension load, so the endplates wouldn't be so heavily loaded. Test number 2 was a success.
Now that we had the package ready to survive a race, we had to make it useful in one. That meant lots of time training drivers to push the car to its limits with aero on. During this time we collected information about the flow patterns over the wings, and used it to improve performance on the track. String tests like the one below let us visualize the flow on various parts of the car, and could identify flow separation indicative of a stalled airfoil. You can see the strings flying on the back side of the rear wing. We used string testing and driver feedback to determine the best angle of attack for the front and rear airfoils, and to validate our addition of a gurney flap to the rear wing.

Testing for flow separation on the rear wing with strings
We competed with the aero package on at FSAE Michigan and FSAE Lincoln, earning our highest placement in the team's history at both. This was the first year I've been to competitions and felt like we were a real contender. Coming off a 15th place finish at Lincoln, and a successful first year with wings, we're ready to start pushing the limits of what we can do with aerodynamics next year.

The car competing in the endurance race at FSAE Michigan
At the end of the year, we reorganized the team to have a subteam specifically devoted to aero. While leading both chassis and aero at once was an experience I won't soon forget, I'm proud to say I got the team to a point where aerodynamics deserves a subteam all to itself. Free from other priorities, next year's team can spend more time analyzing, manufacturing and testing aerodynamic devices, learning a field of engineering not taught at our school by just going out and doing it. That is the formula way after all.
Check out these links to read our front wing and rear wing design documentation

Huge shout out to everybody from across the team that rallied together to make this project a reality, but in particular, Ben Granger, Jose Martinez, Tim Huang, Harish Raja, Aaron Janick and Ellen Zhao.
None of this would have been possible without you guys.